Due to an unfortunate accident with the frozen cookie dough, we didn't get to taste these cookies. Dr. Marcy assured us this is an excellent recipe so I'm posting it anyway! Just be sure to pack the dough into a METAL loaf pan (not a glass one) and DON'T set the pan in the door of the freezer.
Gingersnap Cookies
www.elise.com/recipes/archives/000868gingersnap_cookies.php
8 oz. unsalted butter, softened
1-1/4 cup plus 2 Tbsp sugar
1/2 tsp vanilla extract
1-1/2 large eggs or 2 small eggs
1/3 cup molasses
3 cups all purpose flour
2-1/2 tsp baking soda
1/2 tsp salt
2-1/2 tsp cinnamon
2-1/2 tsp ground ginger
1/8 tsp ground black pepper
1. Cream butter until soft. Add sugar and beat until light and fluffy. Add vanilla and eggs, and beat until well incorporated and smooth. Add molasses and beat until well mixed.
2. Sift dry ingredients; add to the molasses mixture, 1/3 at a time. Mix only until the dry ingredients are incorporated.
3. Line a 9" x 5" METAL loaf pan with plastic wrap so that it hangs out over the pan. Press the dough into the bottom of the pan. Pack it tightly and try to make the top as level as possible. Cover the dough with plastic wrap and freeze overnight.
4. Unwrap and remove dough from the pan. Slice the brick into thin slices, no more than 1/8" thick. Place on a parchment lined sheetpan at least 1" apart. Bake at 350°F until the edges turn dark brown, about 12 minutes.
For softer cookies, bake a bit less. For crunchier cookies, bake a bit longer.
You don't have to make the whole brick at once-- just freeze the remaining dough and slice when you're ready to bake!
Tuesday, March 29, 2011
French Bread (Baguettes)
Unfortunately, I didn't even think about taking photos the first day of class. I was just too excited to remember that I have a camera on my cell phone! The first day was mainly focused on Bread. I will be posting each bread recipe separately as some take longer than others. Plus, it will be easier to find later!
The first recipe is from On Cooking (page 980), the culinary textbook used as a reference by the Research Chefs Association. We halved the recipe in class and made 3 beautiful baguettes. The dough may be used to make baguettes, rolls, or french bread. We used a baguette pan to bake our loaves, but they may also be baked free form. The pans are fairly inexpensive and can be found online for around $20. This is what a baguette pan looks like:
 The French Bread Pan looks similar, but has wider valleys to accommodate the larger bread loaf (only 2 per pan instead of 3). If you don't have one of these pans, you can use a floured kitchen towel on a sheet pan to help maintain shape and prevent the dough from spreading out while rising. See the YouTube Video at the bottom of the post that details how to shape a Baguette for an illustration of this technique.
The trick to this bread is baking in a moist oven. Fill an 8"x8" pan with boiling water and place it in the bottom of the oven while baking the bread. This will help your crust to develop that wonderful crunchy texture found on artisan breads. You could also open the door to the oven and mist the floor and sides of the oven with a spray bottle every 5 minutes or so-- but who has time for that?! I don't want to be glued to my oven door. :-)
French Bread
1 quart (32 oz.) warm water (about 110°F)
1 oz. active dry yeast
3 lbs. 12 oz. Bread Flour
1 oz. salt
1. Combine water and yeast in the mixing bowl of a large capacity stand mixer. Add the remaining ingredients and mix on low speed with dough hook until all the flour is incorporated.
2. Increase speed of mixer to medium low and knead until dough is smooth and elastic.
3. Let the dough rise until doubled. Punch down, divide, shape and slash as desired*. Let rise again until doubled. Preheat oven to 400°F.
4. Place pan of hot water in the bottom of the oven to generate steam while the dough cooks.
5. Bake at 400°F until the crust is well developed and golden brown and the bread is baked through, approximately 12 minutes for rolls and 30 minutes for small loaves. Larger loaves will take a bit longer-- up to 45 minutes.
*Shaping dough: one recipe of dough may be used for: 4 loaves french bread, 6 loaves baguettes, several rolls (pinch off dough into golf-ball sized balls and place on a greased sheet pan). Use a very sharp blade when slashing the dough.
There are several YouTube videos on shaping Baguettes. This one was a good one:
http://www.youtube.com/watch?v=5NEvO2ok-NU&feature=related
Hope you enjoy that fresh baked bread smell!
The first recipe is from On Cooking (page 980), the culinary textbook used as a reference by the Research Chefs Association. We halved the recipe in class and made 3 beautiful baguettes. The dough may be used to make baguettes, rolls, or french bread. We used a baguette pan to bake our loaves, but they may also be baked free form. The pans are fairly inexpensive and can be found online for around $20. This is what a baguette pan looks like:
The trick to this bread is baking in a moist oven. Fill an 8"x8" pan with boiling water and place it in the bottom of the oven while baking the bread. This will help your crust to develop that wonderful crunchy texture found on artisan breads. You could also open the door to the oven and mist the floor and sides of the oven with a spray bottle every 5 minutes or so-- but who has time for that?! I don't want to be glued to my oven door. :-)
French Bread
1 quart (32 oz.) warm water (about 110°F)
1 oz. active dry yeast
3 lbs. 12 oz. Bread Flour
1 oz. salt
1. Combine water and yeast in the mixing bowl of a large capacity stand mixer. Add the remaining ingredients and mix on low speed with dough hook until all the flour is incorporated.
2. Increase speed of mixer to medium low and knead until dough is smooth and elastic.
3. Let the dough rise until doubled. Punch down, divide, shape and slash as desired*. Let rise again until doubled. Preheat oven to 400°F.
4. Place pan of hot water in the bottom of the oven to generate steam while the dough cooks.
5. Bake at 400°F until the crust is well developed and golden brown and the bread is baked through, approximately 12 minutes for rolls and 30 minutes for small loaves. Larger loaves will take a bit longer-- up to 45 minutes.
*Shaping dough: one recipe of dough may be used for: 4 loaves french bread, 6 loaves baguettes, several rolls (pinch off dough into golf-ball sized balls and place on a greased sheet pan). Use a very sharp blade when slashing the dough.
There are several YouTube videos on shaping Baguettes. This one was a good one:
http://www.youtube.com/watch?v=5NEvO2ok-NU&feature=related
Hope you enjoy that fresh baked bread smell!
Monday, March 28, 2011
Cream Scones with Devonshire Cream and Fresh Strawberry Jam

This is the first installment of the Arkansas Cooking Class recipes! You are sure to LOVE these light, flaky scones.
The Cream Scones recipe is from On Cooking, page 956. This is the Culinary Textbook that the Research Chefs Association uses as its reference. The recipes I've tried from the book have been wonderful-- but get ready to do some math. Some of those recipes are written for a crowd!
The Devonshire Cream recipe was one the chef found on a website, but I'm not sure which one. The Strawberry Jam was something we just threw together in class. The amounts in that recipe are estimated based on my memory-- let's hope I remembered correctly.
You'll notice that the ingredients listed in the baking recipes are all weights-- not cups and teaspoons. We did this for a reason. Flour can weigh more or less depending on how humid it is. Weighing the flour gives you a more accurate measure than using cups. Also, I'm sure everyone has heard that baking is a science. Well, IT IS!! Every baking recipe is a careful balance of chemical leaveners, acids, bases, enzymes, salts, etc. Mess with one part of the equation and the whole thing will go out the window-- literally! Leave out the salt in a bread dough and it will rise too fast and taste bland. Out the window to the birds with that one!
Ok. That's enough ranting. On to the recipes.
Cream Scones
1 lb. all purpose flour
1-1/2 oz. white sugar
1 Tbsp baking powder
1 tsp baking soda
1 tsp salt
4 oz. (1 stick) unsalted butter, cold
2 Lg egg yolks (save the whites for later)
11 fl oz. half and half
1. Sift the dry ingredients together, making sure they are blended well.
2. Cut in the butter using a pastry blender (U-shaped with 3 or four blades and a handle). The mixture should look mealy. Be sure not to over mix.
3. Whisk the half and half with the egg yolks. Add to the mealy mixture and combine just until the dough begins to hold together.
4. Roll out the dough to a thickness of about 1/2 inch. Cut into triangles. Place on a parchment lined baking sheet and brush the tops with half and half.
5. Bake at 400°F for about 10 minutes.
6. Brush the tops with butter while hot. Serve warm or at room temperature.
Devonshire Cream (aka Clotted Cream)
4 oz. mascarpone cheese (Italian cream-style cheese)
1 c. heavy whipping cream
1 tsp vanilla
2 Tbsp powdered sugar or caster sugar
1. Place all ingredients in a stand mixer with the whip attachment. Whip until well blended and the consistency of spreadable cream cheese.
2. Store covered tightly with plastic wrap in the refrigerator.
Fresh Strawberry Jam
1 lb. fresh strawberries, hulled and sliced
1/3 cup sugar (approximate-- may need to add more depending on how sweet your strawberries are)
1-2 Tbsp fresh lemon juice
1 envelope fruit glaze
1. Place strawberries, sugar and lemon juice in a pot over medium heat. Cook until fruit is soft and the mixture is syrupy, about 20 minutes. Mash lightly with a potato masher until it is the desired consistency.
2. Prepare glaze according to package directions. Cool slightly, then blend with strawberry mixture.
3. Store covered tightly with plastic wrap in the refrigerator.
Enjoy!!
Thursday, February 24, 2011
Reuben Sandwiches
I have been lusting after Spring for about a month now. I think a lot of us are. One thing that makes me think Spring is St. Patrick's Day. When I think if St. Patty's Day, I think of corned beef and sauerkraut. Then I think of one of my favorite sandwiches-- the Reuben! A friend of mine was talking about Reubens the other day and I've been craving one ever since. You don't have to go to the local deli to enjoy this hearty sandwich. Making them at home is much more fun!
I picked up a corned beef roast at my local supermarket and let it cook low and slow in the crock pot all day. Yum!

For each sandwich, you will need:
This sandwich was very easy to put together. I happily devoured it after a Zumba class. :)
Now I have a BUNCH of corned beef left over. I can only have the same thing so many days in a row. Any ideas on how to use it up?
I picked up a corned beef roast at my local supermarket and let it cook low and slow in the crock pot all day. Yum!

For each sandwich, you will need:
- 2 slices rye bread (my favorite is the swirled rye bread at Winco, but I didn't want to drive that far. I just used the rye bread sold in the deli section of my local store)
- Corned Beef (2-3 oz. cooked shredded corned beef per sandwich)
- Sauerkraut (1/2 cup or so)
- Swiss Cheese (1-2 slices)
- Mustard (I like the deli kind with juicy seeds in it that pop in your mouth)
- Russian Dressing
- Make the Russian Dressing (recipe follows). Set aside.
- Spread about 1 Tbsp or so of the Russian dressing on a slice of bread. Top with corned beef.
- Place the sauerkraut in a paper towel and squeeze to remove excess juice. Sprinkle it on top of the corned beef.
- Lay the Swiss on top of the sauerkraut. Spread the other slice of bread with a thin layer of the grainy mustard and set on top.
- Lightly oil a grill pan, griddle, or skillet with canola or olive oil.
- Grill the sandwich about 2-3 minutes on each side or until toasted. Enjoy!!
- 1/2 cup mayo (I use Best Foods)
- 3 Tbsp ketchup (Heinz)
- 1 tsp Horseradish
- 1 tsp lemon juice
- 1 tsp sweet pickle relish
This sandwich was very easy to put together. I happily devoured it after a Zumba class. :)
Now I have a BUNCH of corned beef left over. I can only have the same thing so many days in a row. Any ideas on how to use it up?
Tuesday, February 15, 2011
Chinese Chicken Two Ways!!
Last week, I made Cashew Chicken following a recipe by Martha Stewart Living (Everyday Food: Great Food Fast). It was ok. Just ok. I made a HUGE mistake and used seasoned rice vinegar instead of regular rice vinegar. This made the dish way too salty. Lesson learned! I made the recipe again and it was MUCH better with the correct vinegar. I still wasn't satisfied. The beauty of Asian food is that it is a perfect balance between salty, spicy, sweet, sour and umami. I set out to tweak the recipe to make it more balanced.
I will post the recipes and photos for both recipes, but let's start with the 'tweaked' one. I took lots of photos of the process and its always good to get the process down first. Then you can tweak it the way you like it and make it your own! Please note that it is best to have everything ready to go before you begin cooking. You won't have time to chop in between steps! Each recipe serves about 6.

Chinese Stir Fried Chicken and Veggies
2 Tbsp. vegetable oil, divided (I used canola)
8 oz. (1/2 lb) button mushrooms, wiped clean and sliced
1 lb. boneless skinless chicken tenders (or breast), cut into 1-1 1/2 inch pieces
1 red bell pepper, chopped
1 cup shredded carrot
6 garlic cloves, minced (or 1-1/2 tbsp Garden Gourmet Garlic Paste)
8 scallions (1 bunch), white and green parts separated, each cut into 1-inch pieces
8 oz. can sliced bamboo shoots, drained
2 Tbsp white vinegar
3 Tbsp Hoisin sauce (found in the Asian aisle)
1 Tbsp soy sauce
1/4 tsp garlic-chile paste (optional)
1/4 cup water
1 tsp corn starch in 2 tsp cool water, stirred well
1/4 tsp Sesame Oil
1/4 tsp black pepper
1/2 cup lightly salted peanuts (optional)
1. Heat 1 Tbsp oil in a large skillet over medium high heat. Add mushrooms and cook until lightly browned and they begin to release their juice, about 7 minutes. Remove to a bowl and set aside.
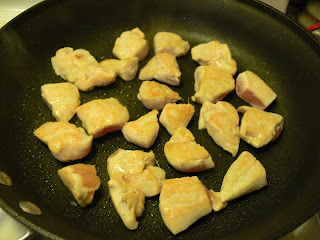
2. Add 1 tsp oil to the pan and HALF of the chicken. Cook about 4 minutes, turning at 2 minutes. The chicken should be lightly browned, but not cooked through. Don't be temped to do all the chicken at once-- you'll overcrowd the pan and will end up steaming the chicken rather than stir frying it. It'll get rubbery if that happens! Remove the chicken from the pan to a plate and repeat with the second half of the chicken.
3. Add the remaining oil to the pan along with the bell pepper, carrots, garlic and whites of the scallions. Cook and stir fry until softened, about 4 minutes.

4. Add chicken and mushrooms, along with any juices, back to the pan with the vegetables. Stir in the vinegar, turn the heat down to medium, and let cook until evaporated, about 3 minutes.

5. Add the bamboo shoots, Soy Sauce, Hoisin Sauce, Chile paste and water. Cook, tossing and stirring, until the chicken is cooked through. This should take from 1 to 3 minutes.


You can amp up the heat of this dish by stirring in some chile paste. I love this stuff! The amount used in this recipe is just enough to warm your tummy. Feel free to add more and kick up the heat.
6. Add the cornstarch/water mixture and cook another minute or two to slightly thicken the sauce. Remove from heat, and stir in the green parts of the scallions and the sesame oil. Stir well. It will look saucy and delicious.

7. I decided to serve over Udon Noodles this time. Found them in the produce section. They only took 3 minutes to cook! Put those in your bowl.

8. Top noodles with chicken/sauce mixture. Sprinkle with a Tbsp or so of lightly salted roasted peanuts for a wonderful crunch if desired (not pictured).

Now on to Recipe #2!!

Cashew Chicken (Martha Stewart)
3/4 cup roasted, unsalted cashews
1-1/2 lbs boneless skinless chicken breast or tenderloins, cut into 1-1 1/2 inch pieces
1/4 tsp freshly ground black pepper
2 Tbsp vegetable oil
6 medium garlic cloves, minced (or 1-1/2 Tbsp Garden Gourmet Garlic Paste)
8 scallions (1 bunch), white and green parts separated, each cut into 1 inch pieces
2 Tbsp rice vinegar (NOT seasoned rice vinegar)
4 Tbsp Hoison Sauce
1 Tbsp soy sauce
1/4 cup water
1-4 tsp sesame oil
1. Preheat oven to 350°F. Place cashews on a baking sheet in a single layer. Toast in oven until fragrant, about 5 minutes. They will crisp up as they cool.
2. Place chicken pieces in a large bowl and sprinkle with pepper. Toss to coat evenly.
3. In a large nonstick skillet , heat 1 Tbsp oil over medium-high heat until very hot. Add half of the chicken pieces to the skillet and stir fry until lightly browned but not cooked through, about 3 minutes. Transfer to a plate.
4. Add the remaining Tbsp vegetable oil to the skillet; then add remaining chicken, garlic and white parts of the scallions. Stir-fry until the chicken is lightly browned but not cooked through, about 3 minutes. Return the first batch of chicken to the pan. Turn heat down to medium and add the rice vinegar. Cook until evaporated, about 30 seconds.
5. Add the Hoisin sauce, soy sauce and water; cook, tossing, until the chicken in cooked through, about 1 minute. Remove from the heat. Stir in the scallion greens, cashews, and sesame oil. Serve over rice or noodles.

When I made this recipe with the right vinegar, I used skinless boneless chicken thighs. I didn't find them to be as tender as the breast meat, but it still tasted good!
I will post the recipes and photos for both recipes, but let's start with the 'tweaked' one. I took lots of photos of the process and its always good to get the process down first. Then you can tweak it the way you like it and make it your own! Please note that it is best to have everything ready to go before you begin cooking. You won't have time to chop in between steps! Each recipe serves about 6.

Chinese Stir Fried Chicken and Veggies
2 Tbsp. vegetable oil, divided (I used canola)
8 oz. (1/2 lb) button mushrooms, wiped clean and sliced
1 lb. boneless skinless chicken tenders (or breast), cut into 1-1 1/2 inch pieces
1 red bell pepper, chopped
1 cup shredded carrot
6 garlic cloves, minced (or 1-1/2 tbsp Garden Gourmet Garlic Paste)
8 scallions (1 bunch), white and green parts separated, each cut into 1-inch pieces
8 oz. can sliced bamboo shoots, drained
2 Tbsp white vinegar
3 Tbsp Hoisin sauce (found in the Asian aisle)
1 Tbsp soy sauce
1/4 tsp garlic-chile paste (optional)
1/4 cup water
1 tsp corn starch in 2 tsp cool water, stirred well
1/4 tsp Sesame Oil
1/4 tsp black pepper
1/2 cup lightly salted peanuts (optional)
1. Heat 1 Tbsp oil in a large skillet over medium high heat. Add mushrooms and cook until lightly browned and they begin to release their juice, about 7 minutes. Remove to a bowl and set aside.
2. Add 1 tsp oil to the pan and HALF of the chicken. Cook about 4 minutes, turning at 2 minutes. The chicken should be lightly browned, but not cooked through. Don't be temped to do all the chicken at once-- you'll overcrowd the pan and will end up steaming the chicken rather than stir frying it. It'll get rubbery if that happens! Remove the chicken from the pan to a plate and repeat with the second half of the chicken.

3. Add the remaining oil to the pan along with the bell pepper, carrots, garlic and whites of the scallions. Cook and stir fry until softened, about 4 minutes.

4. Add chicken and mushrooms, along with any juices, back to the pan with the vegetables. Stir in the vinegar, turn the heat down to medium, and let cook until evaporated, about 3 minutes.

5. Add the bamboo shoots, Soy Sauce, Hoisin Sauce, Chile paste and water. Cook, tossing and stirring, until the chicken is cooked through. This should take from 1 to 3 minutes.


You can amp up the heat of this dish by stirring in some chile paste. I love this stuff! The amount used in this recipe is just enough to warm your tummy. Feel free to add more and kick up the heat.
6. Add the cornstarch/water mixture and cook another minute or two to slightly thicken the sauce. Remove from heat, and stir in the green parts of the scallions and the sesame oil. Stir well. It will look saucy and delicious.

7. I decided to serve over Udon Noodles this time. Found them in the produce section. They only took 3 minutes to cook! Put those in your bowl.

8. Top noodles with chicken/sauce mixture. Sprinkle with a Tbsp or so of lightly salted roasted peanuts for a wonderful crunch if desired (not pictured).

Now on to Recipe #2!!

Cashew Chicken (Martha Stewart)
3/4 cup roasted, unsalted cashews
1-1/2 lbs boneless skinless chicken breast or tenderloins, cut into 1-1 1/2 inch pieces
1/4 tsp freshly ground black pepper
2 Tbsp vegetable oil
6 medium garlic cloves, minced (or 1-1/2 Tbsp Garden Gourmet Garlic Paste)
8 scallions (1 bunch), white and green parts separated, each cut into 1 inch pieces
2 Tbsp rice vinegar (NOT seasoned rice vinegar)
4 Tbsp Hoison Sauce
1 Tbsp soy sauce
1/4 cup water
1-4 tsp sesame oil
1. Preheat oven to 350°F. Place cashews on a baking sheet in a single layer. Toast in oven until fragrant, about 5 minutes. They will crisp up as they cool.
2. Place chicken pieces in a large bowl and sprinkle with pepper. Toss to coat evenly.
3. In a large nonstick skillet , heat 1 Tbsp oil over medium-high heat until very hot. Add half of the chicken pieces to the skillet and stir fry until lightly browned but not cooked through, about 3 minutes. Transfer to a plate.
4. Add the remaining Tbsp vegetable oil to the skillet; then add remaining chicken, garlic and white parts of the scallions. Stir-fry until the chicken is lightly browned but not cooked through, about 3 minutes. Return the first batch of chicken to the pan. Turn heat down to medium and add the rice vinegar. Cook until evaporated, about 30 seconds.
5. Add the Hoisin sauce, soy sauce and water; cook, tossing, until the chicken in cooked through, about 1 minute. Remove from the heat. Stir in the scallion greens, cashews, and sesame oil. Serve over rice or noodles.

When I made this recipe with the right vinegar, I used skinless boneless chicken thighs. I didn't find them to be as tender as the breast meat, but it still tasted good!
Sunday, February 6, 2011
Lili's Fresh Flour Tortillas
Friday was a great day! We had a Superbowl party at work. Our HQ is in Pittsburgh, so there were several Steelers fans on location-- along with a few Packers fans. We decided to serve taco salads, tacos, nachos, refried beans, and chicken wings. We also made everything from scratch (except for the corn tortillas).
I work with some great people. One of those people is a lady named Lili. Lili's heart is bigger than anyone I've ever known. She works very hard, likes to laugh, and makes tortillas for breakfast every morning. This is Lili's recipe for Homemade Fresh Flour Tortillas.
This is the second time I've made tortillas with Lili. She makes the masa (the dough) and I roll it out. Here is the recipe and the technique. I hope you try these at home. They're surprisingly easy! Lili says you can make the masa on the weekend, keep it in the fridge, and use it to make fresh tortillas every day!
This recipe will make quite a few fresh 6" tortillas. You can also freeze the tortillas once cooked and cooled. Just thaw on the counter before use.

Lili's Fresh Flour Tortillas
2-1/2 cups all purpose flour
1-1/2 tsp salt
1/2 tsp baking powder
-Place the dry ingredients in a large bowl. Mix together with your hands until completely blended. As you can see, Lili is quick with her hands!

Add 1/2 cup crisco. Break it into pea sized pieces and roll them in the flour with your hands or use a pastry blender. The mixture should resemble coarse meal-- like when you're making pie dough.

Next, mix in hot water-- as hot as you can stand it. The hotter the water, the softer the tortilla will be. If you use cool water, Lili says the tortilla will break and fracture when you try to bend it. Start with 1 cup of water, and gradually add more by the tablespoon if needed to help the dough form a ball.

Knead the dough for 8 to 10 minutes. The dough ball will look a bit shaggy. Let it rest on the counter for 20 to 30 minutes with a towel over the top of the bowl.

Using your hands, break off golf-ball sized amounts of dough and use your hands to roll them into a ball while folding the dough under to form a dimple. Like this:

Here's what all the dough balls looked like on the rolling mat.

Cover the dough balls with a towel while you roll them out into a tortilla. Take a ball of dough and dip the bottom in all purpose flour. Place it on the mat, and roll in an up and down motion. Pick it up, turn it by a quarter turn, and roll again. Lightly flour the rolling pin if needed, but keep picking it up and rotating it to be sure it doesn't stick. Lili likes to use a rolling pin where the handles have been broken off. She says it gives you a better idea of how much pressure you're using on the dough.

Preheat a skillet over medium low heat. Lili uses a flat cast iron skillet. Lay the rolled tortilla on the skillet and cook it for 2-3 minutes per side. It will puff up-- use a clean potholder or folded up towel to gently press on the tortilla and express the air if it puffs too much.

Here, you can see the little bubbles forming as the tortilla cooks.
You know the tortilla is done when both sides look like the picture above. Keep warm between layers of clean towels and serve.
I hope you enjoy this recipe as much as I did. Thanks, Lili!!
Sunday, January 30, 2011
Bacon, Mushroom and Parmesan Frittata plus a welcome kitchen guest
So, I need something for breakfast that I can cook on the weekend and store in the fridge for the grab-and go kind of mornings we all have during the week. The solution? Frittata. FRITTATA!! A glorious Italian baked omelet thingy. Yes, that's the technical term-- thingy. Hey, it's the weekend! Give me a break. Food Scientists have to turn their brains off sometimes just like everyone else.
Frittata is similar to quiche, but there is less cream and no crust. But still completely delicious! You can mix up the veggies however you wish. You could even bake about 1 Tbsp of egg mixture in a mini muffin pan and serve them at room temp with sour cream as a protein-packed appetizer (those only need to bake about 15 minutes).
Now, say hello to my little friend. I found him crawling around on the windowsill. He told me Spring is on the way. Yay!

Now, a word about bacon. I love it. Do you? Of course you do. But-- do you like cooking it? I don't. I hate going through a dozen paper towels cooking it in the microwave or cleaning the entire kitchen after making it on the stove. The solution-- your oven. Yep! Just line a rimmed cookie sheet with foil, put a layer of bacon slices on it, put the whole tray in a cold oven, turn the oven temp to 425 degrees, and WALK AWAY. Leave it for 20 to 25 minutes, and viola! Perfectly cooked bacon. Remove the slices from the pan and let drain on a plate with paper towels. If you like it a bit crispier, leave it in the oven for an extra 5 minutes.

Here's my recipe and how I put it together.

Bacon, Mushroom and Parmesan Frittata
1 russet potato, peeled and cubed
4 lg. cremini mushrooms, cut in half and sliced thin
3 green onions, white and green parts sliced thin
1/4 tsp thyme
1 tsp salt, divided
5 Tbsp grated fresh Parmesan, divided (NOT the stuff in the green can)
5 whole large eggs, beaten
5 large egg whites, beaten (save the yolks for making homemade pudding-- coming soon)
1/4 cup half and half or milk
1/4 tsp black pepper
5 cherry tomatoes, sliced
1. Place the russet potatoes in a microwave safe dish and cover with water. Cover the container and microwave on high for 4 minutes. Drain. I used a glass bowl with a plate for a lid. You could also substitute 1 to 1-1/2 cups of Ore-Ida Southern Style Hash Browns and thaw them out. Wink wink!
2. Bake bacon according to directions listed above, slice into little bits. Preheat oven to 375 degrees F. Spray a 9" x 13" nonstick pan with oil and set aside.
3. Place about 1 Tbsp of drippings from the bacon pan in a large skillet over medium heat. Add drained cooked potato, mushrooms, green onions, and thyme to pan with 1/2 tsp salt. Saute about 10 to 12 minutes, or until potato is lightly brown and mushrooms are cooked through. Remove from heat and cool.
4. In a large bowl, whisk egg whites and eggs. Add half and half, 3 Tbsp Parmesan cheese, black pepper and the remaining 1/2 tsp salt. Stir well.
5. When the potato mixture is cool, add it to the egg mixture and stir well. Pour into prepared pan. Dot the top with the tomato slices and sprinkle with the remaining 2 Tbsp Parmesan.
6. Bake 20 to 25 minutes, or until puffed and the center is no longer jiggly. Let stand 10 minutes.

7. Slice and serve! I ate a slice, then let the rest cool. I removed them from the pan and put in a container between pieces of waxed paper. Now all I have to do is zap a slice in the microwave for 30 seconds and I have breakfast all week! It also freezes well-- just thaw overnight and zap in the morning. Enjoy!

Subscribe to:
Posts (Atom)